Skip to main content
Last Published 6/2/23
California State University, Fullerton
Hours
Hours Go Here
Lock Icon - login required
Portal
Login
Resources
Search
Search Icon
Dark Mode
Switch to dark mode
on this page
Page Topics
You are now inside the main content area
Show / Hide Left Navigation Menu
Close
Forces Part 2 Setup and Information
Setup Time Estimates
Setup Time Estimates
Initials of Tech Doing Setup
Time Taken
Notes
Equipment
Student Stations
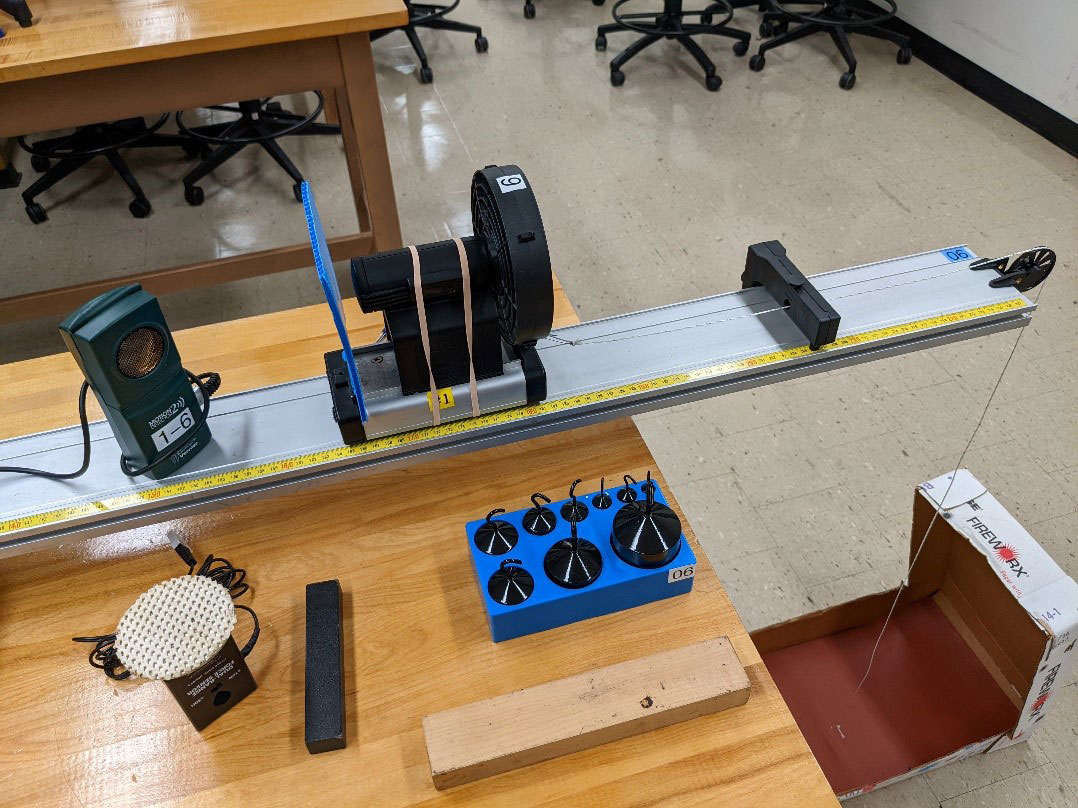
1 Track
2 Stop Brackets
1 Force Probe
1 Motion Sensor
1 Black Bar
1 Wooden Bar
1 Hooked mass set
1 thread WITH PAPERCLIP (Not the rubber bands)
1 Super Pulley
1 Box w/ Cushion
Instructor Stations
None
Setup Instructions
Student Stations
Verify all materials are present before proceeding to set up lab.
Start charging any uncharged AA batteries for the fans.
Put out numbered tracks by station number and place the cart on it to verify level.
If the cart moves then level the track.
Track feet should be 100cm apart, check that they are at:
70cm and 170cm if on left side of room facing instructor.
60cm and 160cm if on right side of room facing instructor.
Place the two stop brackets on the tracks
Attach the thread to the end of the cart and run the thread through/under the stop bracket and over the super pulley.
Attach the fans to the carts with 1-2 rubber bands for security.
- No longer needed with the red/blue carts
Put fully charged batteries in all fans.
Instructor Station
None
Teardown Notes
Remove batteries from all fans
Used in next lab Energy as of 3/1/23
Track
Cart with signal blocker
motion sensor
Documents
Current
0323 a docx
In Progress / Beta
Back To Page Top
mobile menu
Menu
Lock Icon - login required
Portal
Campus Wide
Resources
on this page
Page Topics
Search Icon
Search
switch to light mode
Dark Mode